You know those days when you’re running out the door, starving, and desperately need a snack that won’t make you crash an hour later? That’s exactly why I fell in love with these no bake protein balls. I first whipped them up during a crazy week when I kept forgetting to meal prep – now they’re my go-to for post-workout fuel and those 3pm office snack emergencies.
What I adore about these little energy bites is how ridiculously simple they are. Five minutes of mixing, zero baking, and boom – you’ve got a batch of wholesome snacks ready to grab all week. The peanut butter gives them that rich, satisfying protein punch, while the honey and chocolate chips make them feel like a treat. My kids even sneak them from the fridge thinking they’re getting away with eating candy!
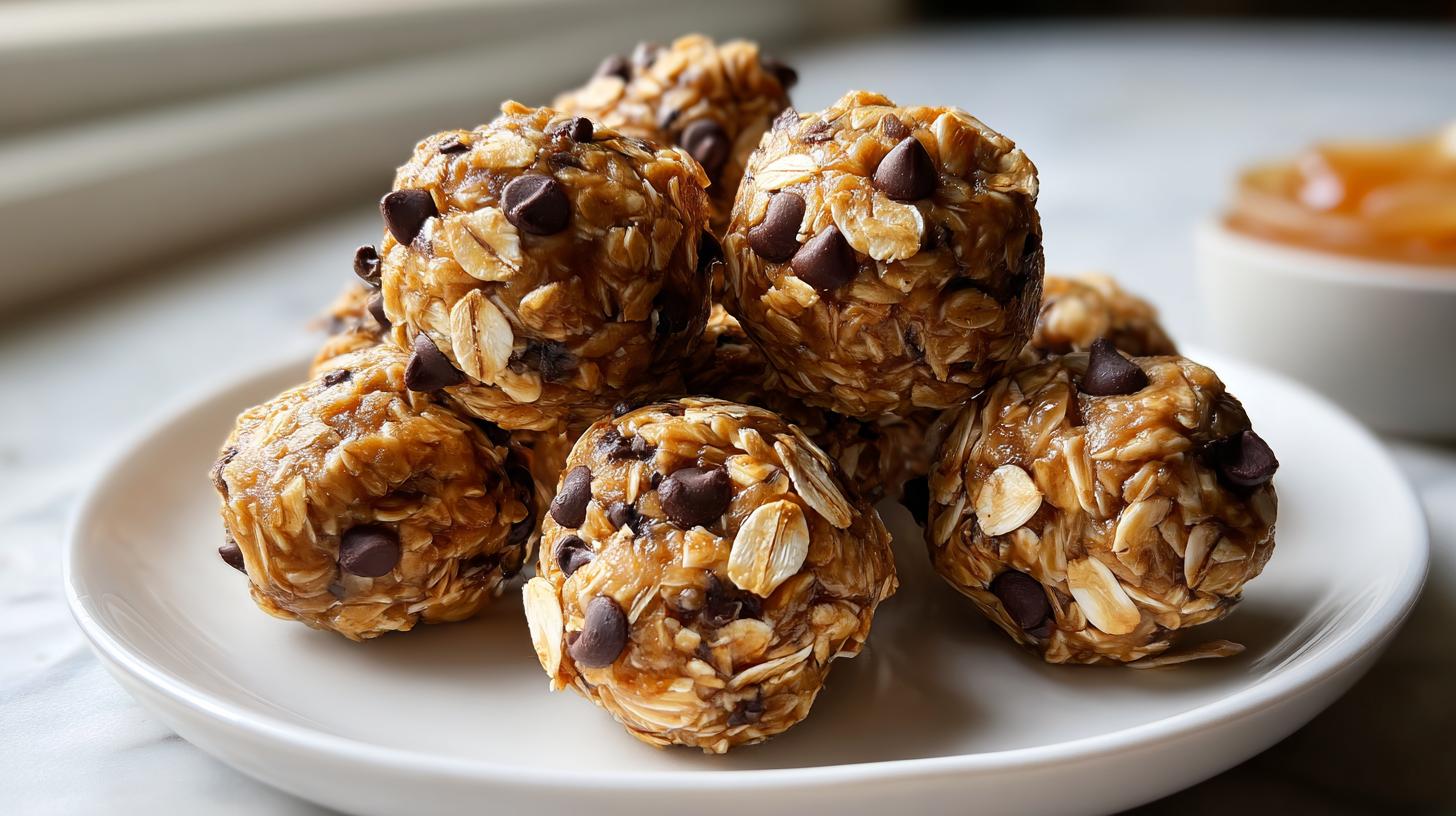
Why You’ll Love These No Bake Protein Balls
Listen, I’m not exaggerating when I say these little oatmeal energy bites will change your snacking game forever. Here’s why:
- Crazy quick – We’re talking 5 minutes of active time (perfect when that afternoon hunger hits like a truck)
- No oven required – Just mix, roll, and chill (my kind of “baking” during summer heat waves)
- Packed with good stuff – Protein from peanut butter, fiber from oats, and just enough honey sweetness to feel like a treat
- Totally customizable – Swap in almond butter, add flaxseeds, or go wild with dried fruit (I’ve made these at least 20 different ways)
They’re my secret weapon for post workout snack emergencies and those “I need chocolate NOW” moments. Plus, kids and adults both go crazy for them!
Ingredients for No Bake Protein Balls
Okay, let’s talk ingredients – and I mean the good stuff that makes these protein balls taste like heaven while still being good for you. Here’s exactly what you’ll need:
- 1/2 cup creamy peanut butter – The natural, drippy kind works best here (skip the super processed stuff with added oils)
- 1/4 cup raw honey – Local if you can get it! Maple syrup works in a pinch too
- 1 cup rolled oats – Must be old-fashioned rolled oats, not instant (trust me, texture matters)
- 1/4 cup mini chocolate chips – The tiny ones distribute better, but regular chips chopped small work too
A quick note about substitutions before we dive in – almond butter swaps in beautifully if you’re allergic to peanuts. And if you’re out of honey? Pure maple syrup gives a lovely caramel note. Just don’t tell my grandma I suggested changing her original recipe!
Equipment You’ll Need
Here’s the beautiful part – you probably already have everything you need to make these no bake protein balls! I literally make these when my kitchen looks like a tornado hit because the equipment list is so simple:
- A medium mixing bowl – Any old bowl will do (I’ve used everything from my fancy glass one to a plastic takeout container in a pinch)
- A sturdy spoon – Wooden works great for mixing the sticky peanut butter and honey
- Measuring cups – Eyeballing works okay, but proper measures keep the texture perfect
- Your hands! – For rolling those beautiful little energy bites (a cookie scoop helps if you’re fancy)
- Airtight container – For keeping them fresh in the fridge (I repurpose old yogurt containers)
That’s it! No fancy mixers, no special pans – just basic tools you can grab without digging through drawers. The simplicity is why I make these weekly!
How to Make No Bake Protein Balls
Alright, let’s get rolling – literally! These protein balls come together so fast you’ll laugh. Here’s exactly how I make them (with all my messy kitchen shortcuts included):
- Mix the sticky stuff first – Dump peanut butter and honey in your bowl and stir like crazy until it’s smooth and dreamy. Pro tip: If your peanut butter’s stiff, microwave it for 10 seconds first!
- Oats go in next – Pour in those rolled oats and mix until every oat is coated in peanut butter goodness. The dough should hold together when you pinch it.
- Chocolate chip time! – Gently fold in those mini chocolate chips (don’t overmix or they’ll melt from the warmth of your hands).
- Roll ’em up – Scoop tablespoon-sized portions and roll between your palms. If sticky, wet your hands slightly or chill the mix for 5 minutes first.
- Chill out – Pop them in the fridge for 20 minutes to firm up. I know it’s tempting, but don’t skip this – it makes all the difference!
See? Told you it was easy! Now try not to eat them all straight from the tray…
Tips for Perfect No Bake Protein Balls
Okay, let me share all my hard-earned tricks for getting these protein balls just right every single time. I’ve made every mistake possible so you don’t have to!
Sticky situation? If the mixture clings to your hands like crazy, don’t panic! Just pop it in the fridge for 5-10 minutes. The peanut butter firms up slightly and suddenly rolling becomes a breeze. Wetting your hands with cold water between balls helps too.
Texture troubles? Too soft? Add another tablespoon or two of oats. Too dry? Drizzle in a teaspoon of honey or peanut butter. You want it to hold together when pinched but not be crumbly.
Chocolate chip hack: Toss those mini chips with a dusting of oats before mixing in – stops them all from sinking to the bottom! Learned this after my third batch where all the chocolate pooled in one sad ball.
Uniform size pro tip: I use a tablespoon cookie scoop (the kind with the lever) for perfectly even balls every time. No more “why is this one three times bigger than the others?” situations.
Freezer trick: For grab-and-go convenience, freeze them on a tray first, then transfer to bags. They thaw in minutes in your lunchbox but stay fresh for weeks!
Variations for No Bake Protein Balls
Oh, the fun really begins when you start playing with this recipe! These no bake protein balls are like a blank canvas – I’ve probably made fifty different versions by now. Here are my absolute favorite twists that still keep them healthy and delicious:
Nut butter swaps: Almond butter gives these a lovely mild flavor, while cashew butter makes them extra creamy. My weirdest (but surprisingly good) experiment? Sunflower seed butter for a nut-free version that turns the balls this cool greenish color!
Superfood boosters: Toss in a tablespoon of chia seeds or ground flaxseed for an omega-3 kick. Sometimes I’ll sneak in a scoop of vanilla protein powder too (just add a splash more honey if it gets dry).
Chocolate chip upgrades: Dark chocolate chips take these oatmeal energy bites to grown-up territory. For serious chocolate lovers, try chopping up a dark chocolate bar into uneven chunks – you get those melty pockets of goodness!
Dried fruit fun: Swap half the chocolate chips for chopped dried cherries or cranberries. The tartness plays beautifully against the sweetness. My kids go nuts when I add mini dried banana chips for crunch.
Coconut craze: Mix in shredded coconut or roll the finished balls in it for a tropical vibe. Toasted coconut takes it over the top – just watch it carefully in the oven (learned that the smoky way).
The best part? You can mix and match these ideas! Last week I did almond butter with dark chocolate chips and dried blueberries – tasted like a fancy energy bar but cost pennies to make. What combo will you try first?
Serving and Storing No Bake Protein Balls
Here’s the beautiful thing about these protein balls – they’re ready to eat straight from the fridge, but I’ve discovered about a million ways to enjoy them! My personal favorite? Popping one right after my morning workout when I need that perfect combo of protein and carbs. They’re also amazing crumbled over yogurt or sliced bananas for breakfast.
Keeping them fresh: Always store these in an airtight container in the fridge – I repurpose old peanut butter jars or those plastic containers takeout comes in. They’ll stay perfect for up to a week, though let’s be real… mine never last that long!
Freezer magic: These freeze like a dream! I always make a double batch now. Just lay them out on a baking sheet to freeze solid first (about 1 hour), then transfer to freezer bags. They’ll keep for 2-3 months frozen. Pro tip: Write the date on the bag unless you enjoy freezer archaeology like me.
Serving temp matters: Straight from the fridge, they’ve got this wonderful firm-but-chewy texture. If you prefer them softer, let them sit out for 5-10 minutes first. Frozen ones thaw in about 15 minutes at room temp, or you can microwave one for 10 seconds in a pinch (careful – chocolate gets melty fast!).
On-the-go packing: I toss a couple in small silicone muffin cups inside my lunchbox – prevents squishing and keeps them from sticking together. They’re the ultimate portable snack for hikes, road trips, or stashing in your desk drawer for emergencies!
Nutritional Information
Now let’s talk numbers – but remember, these are estimates since your exact ingredients might vary slightly from mine. (That local honey you used? Probably has different sugars than my grocery store bottle!) Here’s the breakdown per protein ball:
- 120 calories – Perfect little energy boost without weighing you down
- 4g protein – Thanks to that peanut butter punch (more if you add protein powder!)
- 14g carbs – Mostly from the oats and honey, giving you that quick fuel
- 2g fiber – Those rolled oats keep things moving, if you know what I mean
- 6g fat – The good kind from peanut butter that helps you feel satisfied
A quick heads up – if you use different nut butters or sweeteners, your numbers will shift. Almond butter tends to be slightly lower in protein, while maple syrup has different sugars than honey. But honestly? I don’t stress over exact counts – I just know these give me way better nutrition than grabbing a candy bar when hunger strikes!
Pro tip: For an extra protein boost, I sometimes add a scoop of vanilla protein powder (just reduce the oats by 2 tablespoons to balance it out). Suddenly you’re looking at 6-7g protein per ball – perfect for post-workout recovery!
FAQs About No Bake Protein Balls
Can I use maple syrup instead of honey? Absolutely! I do this all the time when I run out of honey. Maple syrup gives these oatmeal energy bites a lovely caramel flavor – just use the same amount. Agave nectar works too in a pinch. The texture might be slightly stickier, but they’ll still taste amazing.
Are these gluten-free? They sure can be! Just make sure to use certified gluten-free oats if that’s a concern for you. All the other ingredients (peanut butter, honey, chocolate chips) are naturally gluten-free. One of my best friends has celiac disease and these are her favorite post workout snack when we hike together!
How long do they last in the fridge? In an airtight container, these no bake protein balls stay fresh for about a week. If you want them to last longer, freeze them – they’ll keep for 2-3 months that way. Pro tip: I always stash a few in the freezer for those “I need chocolate NOW” emergencies.
Can I make these nut-free? You bet! Sunflower seed butter works beautifully as a peanut butter substitute – just know it’ll make your energy bites turn a fun greenish color (totally normal!). Tahini gives them an interesting savory twist too. My nephew’s preschool actually requests this version for their snack rotation!
Why did my protein balls turn out crumbly? Oh no! This usually happens if the peanut butter wasn’t drippy enough or you packed the oats too densely. Next time, try adding an extra tablespoon of peanut butter or a teaspoon of honey. And measure your oats by spooning them lightly into the cup, not packing them down. They should hold together when pinched before rolling.
Printluscious no bake protein balls – 5-minute power snacks

Easy no-bake protein balls made with peanut butter, honey, rolled oats, and mini chocolate chips. Perfect for a quick snack or post-workout energy boost.
- Prep Time: 10 minutes
- Cook Time: 0 minutes
- Total Time: 30 minutes
- Yield: 12 balls 1x
- Category: Snack
- Method: No-Bake
- Cuisine: American
- Diet: Vegetarian
Ingredients
- 1/2 cup peanut butter
- 1/4 cup honey
- 1 cup rolled oats
- 1/4 cup mini chocolate chips
Instructions
- In a bowl, stir together peanut butter and honey until smooth.
- Mix in rolled oats until evenly combined.
- Fold in mini chocolate chips.
- Scoop and roll into bite-size balls.
- Chill for 20 minutes or until firm.
Notes
- Store in an airtight container in the refrigerator for up to 1 week.
- For firmer balls, freeze for 10 minutes before serving.
- Substitute almond butter for peanut butter if preferred.
Nutrition
- Serving Size: 1 ball
- Calories: 120
- Sugar: 8g
- Sodium: 35mg
- Fat: 6g
- Saturated Fat: 2g
- Unsaturated Fat: 3g
- Trans Fat: 0g
- Carbohydrates: 14g
- Fiber: 2g
- Protein: 4g
- Cholesterol: 0mg
Keywords: no bake protein balls, oatmeal energy bites, chocolate chip energy bites, no bake snacks, healthy meal prep snacks, post workout snack