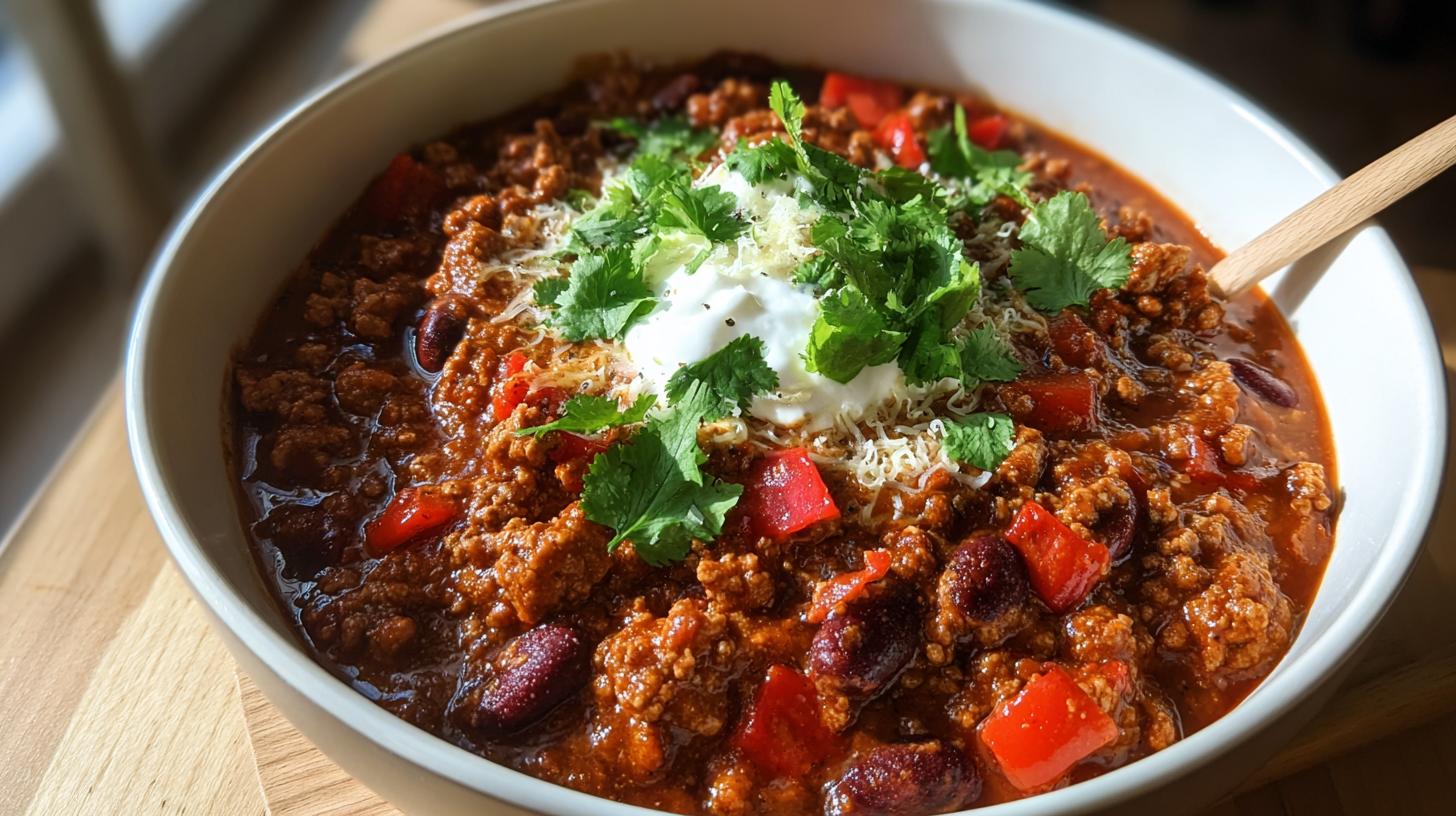
You know those nights when you need something hearty but don’t want to feel weighed down? That’s exactly why I make this protein packed chili at least twice a month. Packed with lean ground turkey and two kinds of beans, it’s my go-to for fueling up without the guilt. The first time I made it, my husband didn’t even notice it wasn’t beef – he just kept going back for seconds!
What I love most (besides the 32g of protein per bowl) is how this chili gets better as it sits. Meal prep magic! Throw it together in one pot on Sunday, and boom – you’ve got lunches ready all week. The spices meld together beautifully, and those kidney beans? They give it such a satisfying texture. Trust me, this isn’t your average chili – it’s the kind of healthy comfort food that actually keeps you full for hours.
Oh! And if you’re worried about cleanup? One pot. That’s it. My kind of cooking.
Why You’ll Love This Protein Packed Chili
Listen, I don’t just make this chili because it’s healthy—I make it because it’s downright delicious and does all the heavy lifting for me. Here’s why it’s become my weeknight hero:
- Keeps you full for hours: Between the lean turkey and those hearty beans, this protein packed chili delivers 32g of protein per bowl. No 3pm snack attacks here!
- One-pot wonder: I live for recipes where I don’t have to wash a mountain of dishes. From browning the turkey to simmering the spices, everything happens in my trusty Dutch oven.
- Meal prep magic: The flavors get even better by day two or three. I always double the batch—half for now, half for freezer meals when I’m too tired to cook.
- Customizable heat: My husband adds extra cayenne to his bowl, while I keep mine mild. Either way, those warm spices make every bite cozy.
Seriously, it’s the kind of recipe that makes you feel like you’ve got your life together—even when you really don’t.
Ingredients for Protein Packed Chili
Here’s everything you’ll need to make this flavor-packed pot of goodness. I’ve made this chili so many times I could probably recite the ingredients list in my sleep – but don’t worry, I’ll walk you through each one!
- 1 tbsp olive oil (the good stuff – it makes a difference!)
- 1 medium onion, diced (I prefer yellow for sweetness)
- 1 green bell pepper, diced
- 1 red bell pepper, diced (trust me, both colors add great flavor)
- 3 cloves garlic, minced (more if you’re feeling bold)
- 1 lb lean ground turkey (93% lean works best)
- 2 tbsp tomato paste (that little can in your fridge is perfect)
- 1 (28 oz) can crushed tomatoes (no need for fancy brands here)
- 1 (15 oz) can kidney beans, drained and rinsed
- 1 (15 oz) can black beans, drained and rinsed
- 1 cup corn (I keep frozen corn on hand for this)
- 2 cups low-sodium chicken broth (or beef if you want richer flavor)
- 2 tbsp chili powder (the backbone of flavor)
- 2 tsp ground cumin (smells like heaven when it hits the pot)
- 1 tsp smoked paprika (my secret weapon)
- 1 tsp dried oregano (rub it between your fingers first)
- 1 tsp salt (or to taste – I always start with less)
- ½ tsp black pepper (freshly ground if you’ve got it)
- Optional: ¼–½ tsp cayenne (for my heat-loving friends)
- Toppings (optional): sour cream or Greek yogurt, chopped cilantro, shredded cheese, sliced jalapeños (go wild!)
Ingredient Notes & Substitutions
Don’t stress if you’re missing something – this chili is super flexible! Here are my tried-and-true swaps:
Ground turkey: The lean protein star, but ground chicken or even 93% lean beef work great too. I’ve used plant-based crumbles when my vegetarian friends come over.
Kidney beans: Pinto beans make a fine substitute if that’s what you’ve got. Just don’t skip rinsing them – that starchy liquid can make the chili too thick.
Broth: I usually use chicken, but beef broth adds deeper flavor. Vegetable broth keeps it vegetarian-friendly.
Spice level: That cayenne is totally optional. Sometimes I’ll add a diced jalapeño with the bell peppers for milder heat.
The beauty of chili? It’s forgiving. As long as you’ve got the basic building blocks (protein, beans, tomatoes, spices), you’re golden.
Equipment Needed for Protein Packed Chili
Here’s the beautiful part – you don’t need any fancy gadgets for this chili! Just grab these trusty kitchen staples:
- Large pot or Dutch oven: My enameled cast iron Dutch oven is perfect for even heat distribution, but any heavy-bottomed pot that holds at least 5 quarts will work.
- Wooden spoon: For stirring and breaking up that ground turkey – metal can scratch your pot.
- Chef’s knife & cutting board: For prepping all those fresh veggies.
- Measuring spoons: Those spices need to be precise!
- Can opener: Because wrestling with stubborn cans is no way to start cooking.
- Colander: For rinsing those beans (so important!).
That’s it! No special equipment required – just the basics you probably already have in your kitchen. See? I told you this was easy.
How to Make Protein Packed Chili
Okay, let’s get cooking! I’ve made this chili so many times I could probably do it with my eyes closed (though I don’t recommend that). Follow these simple steps, and you’ll have a pot of hearty deliciousness ready in no time.
Step-by-Step Instructions
- Heat things up: Warm that olive oil in your Dutch oven or large pot over medium heat. You’ll know it’s ready when a tiny piece of onion sizzles right away.
- Sweat the veggies: Toss in your diced onions and bell peppers. Cook them for about 4-5 minutes until they start to soften – you want them just beginning to get tender, not mushy.
- Garlic time: Stir in those minced garlic cloves and cook for just 30 seconds until fragrant. Careful not to burn it! Burnt garlic will make your whole chili taste bitter.
- Brown the turkey: Add your ground turkey, breaking it up with a wooden spoon as it cooks. Keep stirring until it’s no longer pink, about 5-7 minutes. If there’s excess fat, you can drain it – but I usually leave a little for flavor.
- Tomato paste magic: Stir in the tomato paste and let it cook for a minute. This little step makes all the difference – it caramelizes slightly and gives your chili a deeper, richer base flavor.
- Bring it together: Now add your crushed tomatoes, broth, drained beans, corn, and all those wonderful spices. Stir everything well to combine – I like to scrape the bottom of the pot to get all those flavorful bits mixed in.
- Let it simmer: Bring the chili to a gentle boil, then reduce the heat to low. Let it simmer uncovered for 25-35 minutes, stirring occasionally. You’ll know it’s ready when it’s thickened to your liking and the flavors have melded together beautifully.
That’s it! Now just ladle it into bowls and add your favorite toppings. The hardest part is waiting for that first bite – but trust me, it’s worth it.
Tips for the Best Protein Packed Chili
After making this recipe more times than I can count, here are my can’t-live-without tips:
- Don’t rush the simmer: That 25-35 minute simmer time isn’t just for thickening – it’s when the magic happens. The flavors develop and deepen, turning good chili into amazing chili.
- Drain those beans well: I can’t stress this enough! That starchy liquid in the cans can make your chili too thick. Give them a good rinse under cold water first.
- Adjust heat at the end: If you’re unsure about spice levels, start with less cayenne. You can always add more in the last 10 minutes of cooking if needed.
- Leftovers are gold: The chili tastes even better the next day! If it thickens too much in the fridge, just stir in a splash of broth when reheating.
Remember – chili is meant to be forgiving. If it’s too thick, add broth. Too thin? Let it simmer longer. Not spicy enough? Add more cayenne. Make it yours!
Serving Suggestions for Protein Packed Chili
Now for the fun part – dressing up your chili! I always set out a little “toppings bar” when I serve this because, let’s be honest, half the joy of chili is customizing your bowl. Here’s how I like to serve it:
Must-have toppings:
- A dollop of Greek yogurt or sour cream (the cool creaminess cuts through the spice perfectly)
- Shredded sharp cheddar or Monterey Jack cheese (because melty cheese makes everything better)
- Fresh chopped cilantro (it adds such a bright, fresh contrast)
- Sliced jalapeños for those who like extra heat (my husband’s bowl is basically half chili, half peppers)
My favorite ways to serve it:
- Over a scoop of brown rice or quinoa for an extra protein boost (perfect for stretching leftovers)
- With warm cornbread on the side (I’ll admit – sometimes I crumble it right into the chili)
- Piled onto baked sweet potatoes (scoop out some flesh, fill with chili – instant complete meal)
- With tortilla chips for scooping (great for casual gatherings)
One of my favorite weeknight tricks? I’ll make a big batch of this chili on Sunday, then repurpose it throughout the week. Tuesday it’s chili bowls with all the toppings, Wednesday it’s chili-stuffed baked potatoes, and by Thursday I’m stirring leftovers into scrambled eggs for a protein-packed breakfast. The possibilities are endless!
Pro tip: If you’re serving a crowd, set up a toppings station with small bowls of all the fixings. It lets everyone customize their bowl and makes cleanup a breeze. Just don’t be surprised when the cheese disappears first!
Storage and Reheating Instructions
One of the best things about this protein packed chili? It actually gets better as it sits! Here’s how I store mine so I always have hearty meals ready to go:
Fridge storage: Let the chili cool completely (I usually leave it uncovered for about an hour), then transfer it to airtight containers. It’ll keep beautifully in the fridge for up to 4 days. Pro tip: I portion mine into individual containers for grab-and-go lunches – makes meal prep a breeze!
Freezing: This chili freezes like a dream! I ladle cooled portions into freezer-safe bags or containers, leaving about an inch of space at the top for expansion. Lay the bags flat to freeze – they’ll stack neatly and thaw faster. Good for up to 3 months, though mine never lasts that long!
Reheating: When you’re ready to eat, here’s how I bring it back to life:
- From fridge: Microwave individual portions for 2-3 minutes, stirring halfway. Or reheat on the stovetop over medium-low heat, adding a splash of broth if it’s thickened too much.
- From frozen: Thaw overnight in the fridge first for best results. If you’re in a hurry (we’ve all been there!), microwave frozen chili in 2-minute intervals, stirring between, until heated through.
Fun fact: The flavors intensify after freezing! Those spices really meld together. Sometimes I’ll intentionally freeze half the batch just for this effect. Just remember – always give your chili a good stir when reheating to redistribute all those delicious juices.
Nutritional Information for Protein Packed Chili
Now, I’m no nutritionist, but I can tell you this chili packs a serious protein punch while keeping things balanced. Those numbers you see below? They’re estimates based on standard ingredients – your mileage may vary depending on the brands you use and how generous you are with the cheese topping (no judgment here!).
What matters most is that this chili gives you:
- A hefty dose of lean protein from the turkey and beans to keep you satisfied
- Plenty of fiber from all those veggies and legumes
- Complex carbs that won’t spike your blood sugar
- Healthy fats from the olive oil (and okay, maybe that extra sprinkle of cheese)
Remember, nutrition isn’t just about numbers – it’s about how food makes you feel. And this chili? It makes me feel energized, satisfied, and ready to tackle whatever comes next. That’s the real magic!
Frequently Asked Questions
Can I use ground beef instead of turkey?
Absolutely! I’ve made this with 93% lean ground beef when turkey wasn’t available – it’s just as delicious. The cooking method stays exactly the same. Just drain any excess fat after browning if needed.
How can I make this chili spicier?
Oh, I’ve got you covered! My favorite ways to turn up the heat:
- Add an extra ¼ tsp cayenne pepper
- Throw in a diced jalapeño with the bell peppers
- Stir in a dash of hot sauce at the end
- Top with sliced fresh jalapeños
Start small – you can always add more spice, but you can’t take it out!
Can I make this in a slow cooker?
You bet! After browning the turkey and sautéing the veggies (don’t skip this step!), transfer everything to your slow cooker. Cook on LOW for 6-8 hours or HIGH for 3-4 hours. The longer it cooks, the deeper the flavors get!
What’s the best way to meal prep this chili?
Here’s my foolproof system:
- Let chili cool completely before portioning
- Use individual microwave-safe containers for grab-and-go lunches
- Freeze single servings flat in freezer bags for easy stacking
- Write the date on containers with a marker (trust me, you’ll forget otherwise!)
I usually make a double batch – one for now, one for later. Future you will thank present you!
Can I make this vegetarian?
Of course! Swap the turkey for an extra can of beans (I like pinto or white beans) or plant-based crumbles. Use vegetable broth instead of chicken. You’ll still get that protein punch from the beans – and all the same great flavor!
There you have it – all my chili secrets! Now it’s your turn. Try this protein packed chili recipe and share your results with me. Did you add extra spice? Find a killer new topping combo? I want to hear all about it!
Print32g Protein Packed Chili Recipe for a Satisfying Meal
A protein-packed chili made with lean ground turkey, kidney beans, and black beans. This healthy chili recipe is perfect for meal prep and is cooked in one pot for easy cleanup.
- Prep Time: 15 minutes
- Cook Time: 35 minutes
- Total Time: 50 minutes
- Yield: 6 servings 1x
- Category: Main Dish
- Method: Stovetop
- Cuisine: American
- Diet: Low Fat
Ingredients
- 1 tbsp olive oil
- 1 medium onion, diced
- 1 green bell pepper, diced
- 1 red bell pepper, diced
- 3 cloves garlic, minced
- 1 lb lean ground turkey (or lean ground beef)
- 2 tbsp tomato paste
- 1 (28 oz) can crushed tomatoes
- 1 (15 oz) can kidney beans, drained and rinsed
- 1 (15 oz) can black beans, drained and rinsed
- 1 cup corn (frozen or canned, drained)
- 2 cups low-sodium chicken broth (or beef broth)
- 2 tbsp chili powder
- 2 tsp ground cumin
- 1 tsp smoked paprika
- 1 tsp dried oregano
- 1 tsp salt (or to taste)
- ½ tsp black pepper
- Optional: ¼–½ tsp cayenne (for heat)
- Toppings (optional): sour cream or Greek yogurt, chopped cilantro, shredded cheese, sliced jalapeños
Instructions
- Heat olive oil in a large pot or Dutch oven over medium heat. Add onion and bell peppers and cook 4–5 minutes until softened.
- Stir in garlic and cook 30 seconds until fragrant.
- Add ground turkey and cook until browned, breaking it up with a spoon; drain excess fat if needed.
- Stir in tomato paste and cook 1 minute to deepen flavor.
- Add crushed tomatoes, broth, kidney beans, black beans, and corn.
- Season with chili powder, cumin, smoked paprika, oregano, salt, pepper, and cayenne if using.
- Bring to a gentle boil, then reduce heat and simmer uncovered 25–35 minutes, stirring occasionally, until thick.
- Serve hot with a dollop of sour cream and a sprinkle of cilantro.
Notes
- Store leftovers in an airtight container for up to 4 days.
- Freeze for up to 3 months.
- Adjust cayenne for desired spice level.
Nutrition
- Serving Size: 1 bowl
- Calories: 390
- Sugar: 8g
- Sodium: 700mg
- Fat: 10g
- Saturated Fat: 2g
- Unsaturated Fat: 5g
- Trans Fat: 0g
- Carbohydrates: 45g
- Fiber: 12g
- Protein: 32g
- Cholesterol: 60mg
Keywords: protein packed chili, ground turkey chili, healthy chili recipe, meal prep chili, chili with kidney beans, easy one pot chili