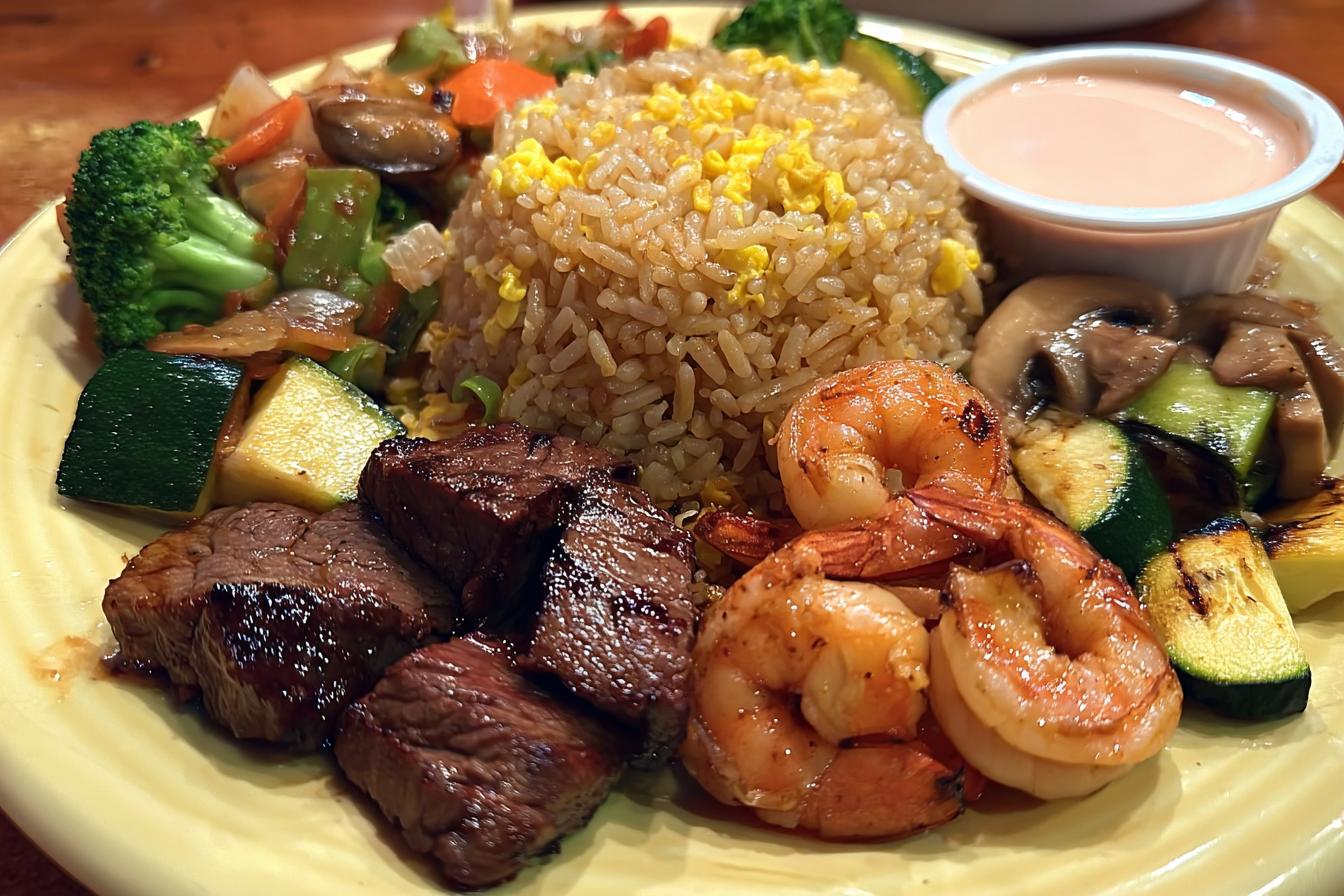
You know that sizzle when the chef tosses shrimp onto the hot grill at a Japanese steakhouse? The way the garlic butter hits the steak and suddenly the whole room smells incredible? That’s exactly what I wanted to recreate at home—without needing a flaming onion volcano or fancy knife skills. My 45-Minute Hibachi Steak and Shrimp recipe brings all those bold flavors right to your kitchen. It’s our family’s go-to when we’re craving something fun and interactive (and way cheaper than a night out). The best part? You control the garlic butter—no shame in extra glazes here.
Why You’ll Love This Hibachi Steak and Shrimp Recipe
This isn’t just another stir-fry—it’s your ticket to sizzling Japanese steakhouse magic at home. Here’s why this Hibachi Steak and Shrimp recipe will become your new favorite:
- Faster than takeout: From fridge to plate in under 45 minutes (and most of that’s hands-off cooking time)
- Big flavors: Garlic butter-kissed steak, teriyaki-glazed shrimp, and that addictive yum yum sauce you’ll want to put on everything
- Better than restaurants: Control your portions (extra shrimp, please!) and skip the wait for a table
- Fun to make: Get the whole family involved in tossing veggies or scrambling the fried rice
The first time I made this, my kids swore we’d been teleported to our favorite hibachi spot—minus the onion volcano theatrics!
Ingredients for Hibachi Steak and Shrimp
Gathering everything before you start cooking makes this hibachi feast come together like magic. I’ve learned the hard way – running to the fridge mid-cook leads to overcooked shrimp or rubbery steak. Here’s exactly what you’ll need, grouped so you can prep efficiently:
Hibachi Steak and Shrimp Components
The stars of the show need proper prep for that authentic steakhouse texture:
- 1 lb sirloin steak – Cut into 1-inch cubes (trim any tough fat first)
- 1 lb large shrimp – Peeled, deveined, tails removed (trust me, tails make messy eating)
- 4 cups cooked white rice – Must be chilled (day-old works perfectly)
- 2 eggs – Lightly beaten with a fork (no need to get fancy here)
Hibachi Vegetables
These veggies caramelize beautifully on the hot skillet:
- 2 cups broccoli florets – Cut into bite-sized pieces
- 1 zucchini – Chopped into ½-inch chunks
- 1 cup sliced mushrooms – White or baby bella work great
- 1 cup carrot slices – Cut on the diagonal (it’s prettier!)
Sauces & Seasonings
Where the magic happens – measure these carefully:
- 3 tablespoons butter – Divided (keep some for steak, some for shrimp)
- 2 tablespoons vegetable oil – Divided (high smoke point is key)
- 3 tablespoons soy sauce – Divided (I use low-sodium to control saltiness)
- 1 tablespoon teriyaki sauce – The glaze for our shrimp
- 2 cloves garlic – Minced fine (no lazy chopping here!)
- ½ teaspoon each salt & black pepper
- ½ teaspoon garlic powder – Yes, fresh AND powdered garlic – it’s worth it
- ¼ teaspoon red pepper flakes – Optional but adds nice warmth
Yum Yum Sauce Ingredients
This creamy pink sauce is non-negotiable:
- ½ cup mayonnaise – Full-fat for best texture
- 2 tablespoons ketchup – Sounds weird, tastes amazing
- 1 tablespoon melted butter – The secret richness
- 1 teaspoon rice vinegar – Just enough tang
- ½ teaspoon each garlic powder & paprika
- 1 tablespoon water – To thin as needed
Pro tip: Measure everything into little bowls before heating your skillet – hibachi cooking moves fast once you start!
How to Make Hibachi Steak and Shrimp
Now comes the fun part – cooking everything just like they do at those sizzling hibachi grills! I’ve broken this down into easy steps so you can focus on the flavors, not the frenzy. Pro tip: Keep your exhaust fan on – things get deliciously smoky!
Step 1: Prepare the Yum Yum Sauce
First, let’s make that iconic pink sauce. Grab a small bowl and whisk together the mayonnaise, ketchup, melted butter, rice vinegar, garlic powder, and paprika until completely smooth. The consistency should be like a thin ranch dressing – if it’s too thick, add water ½ teaspoon at a time until it flows nicely off a spoon. Taste and adjust – sometimes I sneak in an extra pinch of garlic powder. Set this aside (but good luck not dipping your finger in for “quality checks”).
Step 2: Cook the Hibachi Steak
Here’s where we get that perfect sear. Pat your steak cubes completely dry with paper towels – this is crucial for browning, not steaming. Heat 1 tablespoon vegetable oil in your largest skillet or griddle over medium-high until it shimmers (about 2 minutes). Add the steak in a single layer – don’t crowd them! Let them sear undisturbed for 2-3 minutes until you see a dark golden crust. Flip and cook another 2 minutes for medium-rare (longer if you prefer more done). Now the magic: add 1 tablespoon butter and 1 tablespoon soy sauce, swirling the pan until the steak glistens. Transfer to a plate – those juices will make you swoon.
Step 3: Sauté the Hibachi Shrimp
Same pan, no need to wipe it out – those steak bits add flavor! Add another tablespoon of oil if needed, then toss in the shrimp. They’ll cook fast – just 2-3 minutes total, flipping once when they turn pink on the bottom. When they curl into little “C” shapes, they’re done. Kill the heat and stir in 1 tablespoon butter plus the teriyaki sauce – the residual heat will create this glossy, sticky glaze that clings perfectly to each shrimp. Set these aside with the steak (and try not to eat half of them straight from the pan).
Step 4: Stir-Fry Hibachi Vegetables
Time for veggies! Add the remaining oil to the pan over medium-high heat. Start with the carrots – they take longest – stirring for about 2 minutes until slightly softened. Then add broccoli and zucchini, cooking another 3 minutes until bright green but still crisp. Finally, toss in mushrooms and garlic, stirring constantly for 1 minute until fragrant. Season with remaining soy sauce, black pepper, and red pepper flakes if using. You want that perfect “crisp-tender” texture – bite a broccoli floret to test. Push everything to the pan’s edges or transfer to a bowl if your skillet’s crowded.
Step 5: Make Hibachi Fried Rice
The grand finale! Melt the last tablespoon of butter in the center of your pan. Pour in the beaten eggs and scramble quickly with a spatula until just set – they’ll continue cooking. Immediately add the chilled rice (this is why we chilled it – hot rice turns mushy!), breaking up any clumps. Drizzle with remaining soy sauce and stir-fry vigorously for 3-4 minutes until some grains get lightly toasted. The rice should dance across the pan when you shake it – that’s how you know it’s perfect. Mix in the veggies if you set them aside.
Now assemble your masterpiece: fluffy rice piled high, surrounded by glistening steak and shrimp, with veggies artfully arranged (or haphazardly dumped – no judgment here). Don’t forget that yum yum sauce for dipping – I always make extra because someone inevitably drinks it straight from the bowl.
Tips for Perfect Hibachi Steak and Shrimp
After making this recipe dozens of times (and yes, burning a few shrimp along the way), I’ve learned these game-changing tricks:
- Prep everything first – Hibachi cooking moves fast! Having all ingredients measured and chopped prevents overcooked disasters.
- Dry that steak! Pat cubes thoroughly with paper towels – moisture is the enemy of that perfect crust.
- High heat is your friend That sizzle when food hits the pan means flavor is happening. Don’t be shy with the burner.
- Taste your yum yum sauce early Adjust with extra garlic powder or vinegar until it makes you go “Wow!”
- Cold rice only Freshly cooked rice turns to mush. Overnight fridge rice fries up beautifully.
My biggest lesson? Always make extra yum yum sauce. Trust me on this one.
Serving Suggestions for Hibachi Steak and Shrimp
Now comes my favorite part – plating up this colorful feast! I like to start with a big scoop of fried rice as the base – it soaks up all those delicious juices. Arrange the hibachi steak and shrimp artfully on top (or just dump them happily – we’re not running a Michelin-star kitchen here). Scatter those gorgeous caramelized veggies around the edges.
Here’s how I take it to the next level:
- Sesame seeds: A sprinkle of toasted white or black sesame seeds adds nutty crunch
- Green onion confetti: Thinly sliced scallions give fresh contrast to the rich flavors
- Lemon wedges: A squeeze brightens everything up beautifully
- Extra yum yum sauce: Serve it in little ramekins for dipping (I always need refills!)
For the full hibachi experience, set out small bowls of soy sauce and extra teriyaki glaze. Chopsticks are fun, but no shame in using forks – those steak cubes can be slippery! If you’re feeling fancy, garnish with a few pickled ginger slices or wasabi on the side for heat lovers.
Pro tip: Warm your plates first – it keeps everything hot longer. I sometimes use our electric griddle set to “warm” as a serving station so we can graze family-style, just like at our favorite Japanese steakhouse.
Hibachi Steak and Shrimp Variations
One of my favorite things about this recipe is how easily you can mix it up based on what’s in your fridge or what your family craves. Here are some delicious twists we’ve tried over the years – some became so popular they earned permanent spots in our rotation!
Protein Variations
The steak and shrimp combo is classic, but don’t be afraid to play around:
- Chicken hibachi: Swap the steak for boneless thighs (more flavor!) or breasts cut into bite-sized pieces. Cook until golden and no pink remains.
- Salmon surprise: Skinless salmon fillets cut into chunks cook beautifully in about the same time as shrimp. The rich flavor pairs amazingly with yum yum sauce.
- Vegetarian version: Double up on mushrooms and add extra-firm tofu cubes (pat them dry first!). The tofu soaks up all those delicious sauces.
- Scallop upgrade: For special occasions, sea scallops seared quickly in garlic butter make this dish feel extra luxurious.
Vegetable Swaps
The veggies are where you can really get creative:
- Colorful bell peppers: Thinly sliced red, yellow, or orange peppers add sweetness and crunch. Add them with the zucchini.
- Snow peas: Their crisp texture holds up great – toss them in during the last minute of cooking.
- Baby corn: My kids love these mini cobs – they look just like hibachi restaurant versions!
- Bok choy: Chop the stems like celery and add the leafy greens at the very end.
- Water chestnuts: That unexpected crunch takes me right back to my favorite teppanyaki spot.
The beauty of hibachi cooking? There are no wrong answers. Last week I threw in some leftover asparagus and it was fantastic. Just remember – harder veggies like carrots go in first, delicate ones like bean sprouts get added last. And when in doubt, more garlic butter never hurts!
Storing and Reheating Hibachi Steak and Shrimp
Let’s be real – leftovers from this hibachi feast are almost better than the first serving! But only if you store and reheat them right. Here’s how I keep everything tasting fresh and delicious:
Storage tips:
- Cool components separately before packing – hot food makes containers sweat and turns crispy rice soggy
- Use airtight containers – I’m partial to glass ones that don’t absorb odors
- Keep yum yum sauce in its own little jar (trust me, you’ll want to dip random fridge snacks into it)
- Refrigerate within 2 hours – this keeps everything safe and tasty
Your hibachi steak and shrimp will stay perfect in the fridge for 3 days – though in my house, it never lasts that long! The fried rice actually improves as the flavors meld.
Reheating like a pro:
- Skillet method (best for texture): Heat a drizzle of oil over medium-high. Add rice first, breaking up clumps. Once hot, push to the side and add steak/shrimp just until warmed through – about 2 minutes total.
- Microwave hack (when you’re starving now): Place rice on a plate, top with proteins, cover with a damp paper towel, and nuke in 30-second bursts. Stir between bursts to prevent rubbery shrimp.
- Vegetable revival: Toss those hibachi veggies into the skillet last minute – they’ll regain their crisp-tender bite.
Pro tip: If your rice seems dry when reheating, sprinkle a teaspoon of water over it before microwaving or add a pat of butter to the skillet. And whatever you do – don’t forget to rewarm that yum yum sauce! Cold sauce on hot food is a crime against hibachi.
Hibachi Steak and Shrimp Nutrition
Now, I’m no dietitian, but I know folks like to have a general idea of what they’re eating – especially when it tastes this good! Keep in mind these numbers are estimates based on my exact ingredients. Your mileage may vary depending on how heavy-handed you are with that delicious yum yum sauce (no judgment here!).
- Calories: About 720 per generous serving (but who’s counting when it’s this delicious?)
- Protein: A whopping 52g – thanks to that perfect combo of steak and shrimp
- Carbs: 52g (mostly from the rice – swap for cauliflower rice if you’re watching carbs)
- Fat: 38g (remember, we’re using real butter here – none of that fake stuff!)
- Sodium: 1200mg (use low-sodium soy sauce if you’re sensitive)
The veggies pack in 4g of fiber, and you’re getting decent amounts of iron and vitamin A from the steak and carrots. But let’s be honest – we’re not eating hibachi for the nutrition facts. We’re eating it because it’s downright magical how these simple ingredients transform into something so incredibly flavorful!
Pro tip: If you’re watching portions, the steak and shrimp alone make an amazing protein-packed meal over salad greens – just drizzle with a bit of that yum yum sauce watered down with rice vinegar for a lighter dressing.
Frequently Asked Questions
Over the years, I’ve gotten so many great questions about this Hibachi Steak and Shrimp recipe – here are the ones that come up most often with my tried-and-true answers:
Can I use frozen shrimp instead of fresh?
Absolutely! Just thaw them overnight in the fridge or under cold running water first. Pat them extra dry with paper towels – frozen shrimp release more moisture when cooking. And don’t skip that teriyaki butter glaze – it makes even frozen shrimp taste incredible.
Help! My fried rice turned mushy – what went wrong?
Two likely culprits: using freshly cooked rice (always chill it first!) or overcrowding the pan. Your rice needs space to dance across that hot surface. If disaster strikes, spread the rice on a baking sheet and pop it under the broiler for a minute – the quick heat can rescue some crispness.
Is there a substitute for yum yum sauce?
While nothing beats the real thing, in a pinch mix equal parts mayo and sweet chili sauce with a squeeze of lemon. But trust me – once you try homemade yum yum sauce, you’ll never go back. It keeps for a week in the fridge (if it lasts that long!).
Can I make this ahead for meal prep?
You sure can! Cook everything except the fried rice (that’s best fresh). Store components separately in airtight containers. When ready to eat, quickly scramble fresh eggs with chilled rice – it’ll taste just-made. The steak and shrimp reheat beautifully in a hot skillet.
What’s the best cut of steak for hibachi?
Sirloin gives great flavor at a reasonable price, but feel fancy with filet mignon if you’re celebrating! Just avoid super lean cuts – that marbling keeps the cubes juicy during quick cooking. Pro tip: Slice against the grain for maximum tenderness.
Ready to Make Hibachi Steak and Shrimp?
Now that you’ve got all my best hibachi secrets, it’s time to fire up that skillet and create some magic! I still remember the first time I nailed this recipe – watching my family’s eyes light up when they tasted that garlic-butter steak made all the trial runs worth it. Don’t stress if your first attempt isn’t perfect (my early versions were more “charcoal surprise” than hibachi). The beauty of cooking is that there’s always another meal to get it right.
When you do make it – and I know you will – tag me in your photos! There’s nothing I love more than seeing your sizzling skillets and sauce-drizzled masterpieces. Did you add an extra ingredient? Burn the rice spectacularly? Find a brilliant shortcut? Tell me everything – we’re all learning together in this delicious kitchen adventure.
One last pro tip before you go: Double the yum yum sauce recipe. Seriously. You’ll thank me when you’re dipping everything from breakfast eggs to midnight snacks in that pink gold. Now grab those tongs and let’s get cooking – your personal hibachi grill awaits!
Print45-Minute Hibachi Steak and Shrimp Recipe – Irresistible Flavor
A delicious hibachi-style steak and shrimp dish with vegetables and homemade yum yum sauce.
- Prep Time: 20 minutes
- Cook Time: 25 minutes
- Total Time: 45 minutes
- Yield: 4 servings 1x
- Category: Main Dish
- Method: Stir-fry
- Cuisine: Japanese
- Diet: Low Lactose
Ingredients
- 1 lb sirloin steak, cut into bite-sized cubes
- 1 lb large shrimp, peeled and deveined
- 4 cups cooked white rice, chilled
- 2 eggs, lightly beaten
- 2 cups broccoli florets
- 1 zucchini, chopped into chunks
- 1 cup sliced mushrooms
- 1 cup carrot slices
- 3 tablespoons butter, divided
- 2 tablespoons vegetable oil, divided
- 3 tablespoons soy sauce, divided
- 1 tablespoon teriyaki sauce
- 2 cloves garlic, minced
- ½ teaspoon salt
- ½ teaspoon black pepper
- ½ teaspoon garlic powder
- ¼ teaspoon red pepper flakes, optional
- For the Yum Yum Sauce:
- ½ cup mayonnaise
- 2 tablespoons ketchup
- 1 tablespoon melted butter
- 1 teaspoon rice vinegar
- ½ teaspoon garlic powder
- ½ teaspoon paprika
- 1 tablespoon water, or as needed to thin
Instructions
- In a small bowl, whisk together mayonnaise, ketchup, melted butter, rice vinegar, garlic powder, paprika, and water until smooth. Set the yum yum sauce aside.
- Pat the steak cubes dry with paper towels, then season with salt, black pepper, and garlic powder.
- Heat 1 tablespoon vegetable oil in a large skillet or griddle over medium-high heat.
- Add the steak cubes and sear for 2–3 minutes per side until browned and cooked to your preferred doneness.
- Stir in 1 tablespoon butter and 1 tablespoon soy sauce, tossing the steak until glossy. Remove from the skillet and set aside.
- Add the shrimp to the same skillet and cook for 2–3 minutes, flipping once, until pink and lightly browned.
- Stir in 1 tablespoon butter and teriyaki sauce, then remove the shrimp from the skillet.
- Add the remaining vegetable oil to the skillet, then add broccoli, zucchini, mushrooms, and carrots.
- Sauté the vegetables for 5–7 minutes until crisp-tender, then season with 1 tablespoon soy sauce, garlic, black pepper, and red pepper flakes if using.
- Push the vegetables to one side or remove them from the skillet.
- Add the remaining butter to the skillet, then pour in the beaten eggs and scramble until just set.
- Add the chilled rice and remaining soy sauce, stirring until the rice is hot, lightly browned, and mixed with the egg.
- Serve the fried rice with hibachi steak, shrimp, sautéed vegetables, and yum yum sauce on the side.
Notes
- Use chilled rice for best results when making fried rice.
- Adjust the red pepper flakes for more or less heat.
- Cook steak to your preferred doneness.
Nutrition
- Serving Size: 1 serving
- Calories: 720
- Sugar: 8g
- Sodium: 1200mg
- Fat: 38g
- Saturated Fat: 12g
- Unsaturated Fat: 22g
- Trans Fat: 0g
- Carbohydrates: 52g
- Fiber: 4g
- Protein: 52g
- Cholesterol: 280mg
Keywords: Hibachi Steak and Shrimp, Japanese Steakhouse Dinner, Steak and Shrimp Recipe, Hibachi Vegetables, Yum Yum Sauce, Homemade Hibachi